
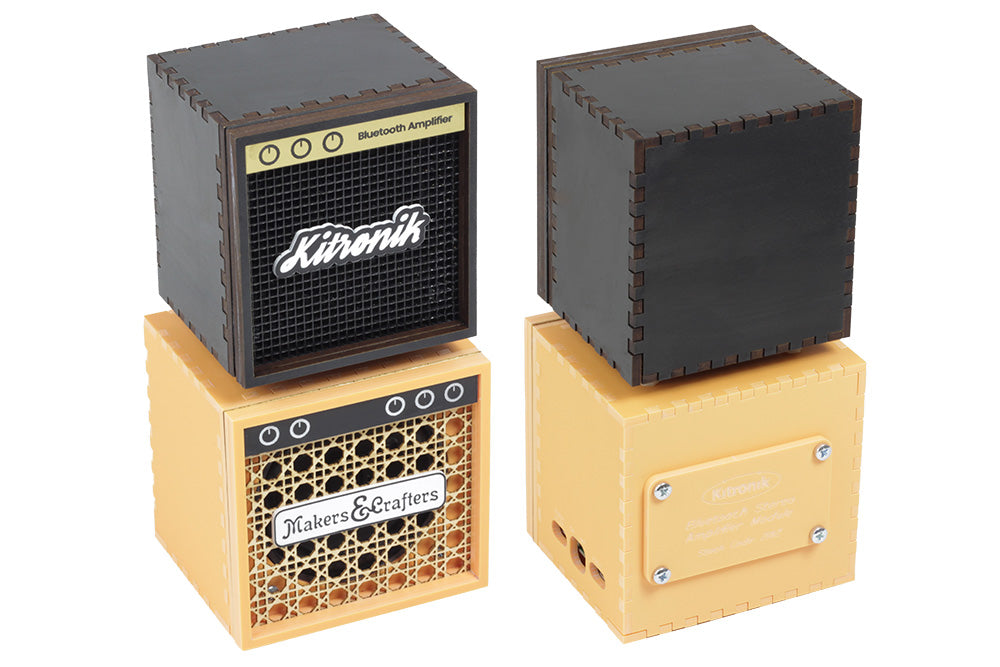
This make takes on the challenge of creating an enclosure for our Bluetooth Amplifier Kit, and making it look cool! This stacked Concert amplifier-style enclosure will bring a little Rock ’n’ Roll to your space in a neat, rechargeable package!
Follow along with Emma's excellent instructions and build your own. As always, the DXF required for this make is shared below.

We Have Used:
- This DXF file.
- 1 x PERSPEX® Sweet Pastels Orange Fizz Sheet.
- 1 x Maple Veneer Sheet.
- 1 x Black Painted MDF Sheet.
- 1 x Black HIPS Sheet.
- 1 x Black on White Laser Laminate Sheet.
- 1 x Gold Metalgraph Laminate Sheet.
- 1 x Bluetooth Amplifier Kit.
- 24 x 6mm M3 Pan Head Screws.
- 4 x 16mm M3 Pan Head Screws.
- 12 x M3 Hex Nuts.
- 8 x 8mm Plastic Spacers.
- 4 x Rubber Feet.
- Laser Cutter.
- Superglue or Plastic Weld
- Wood Glue

How We Made It:
Step 1 - Download and view the DXF:
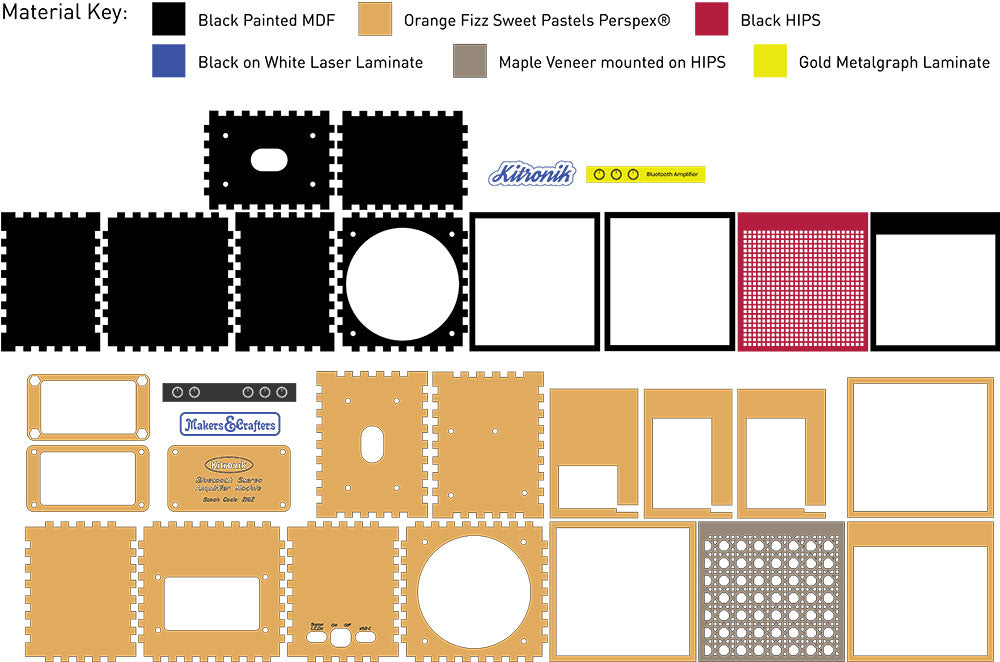
Check out the DXF! This one is complex so the below image is a diagram explaining the different pieces of the enclosure.
Step 2 - To the laser cutter:
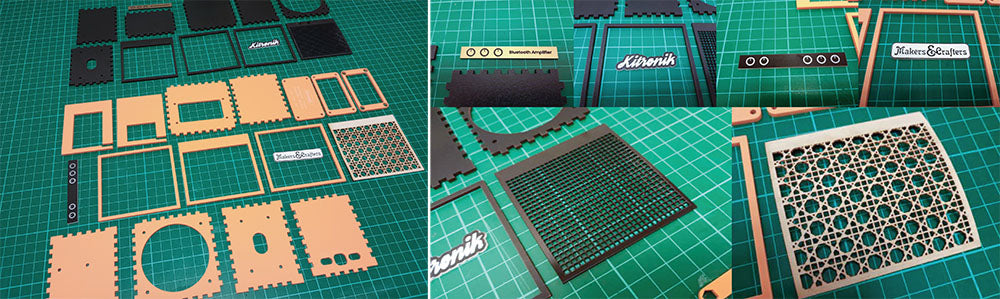
Laser cut the design! The speaker grills can be delicate so make sure you take care when cutting them and test the cut first.
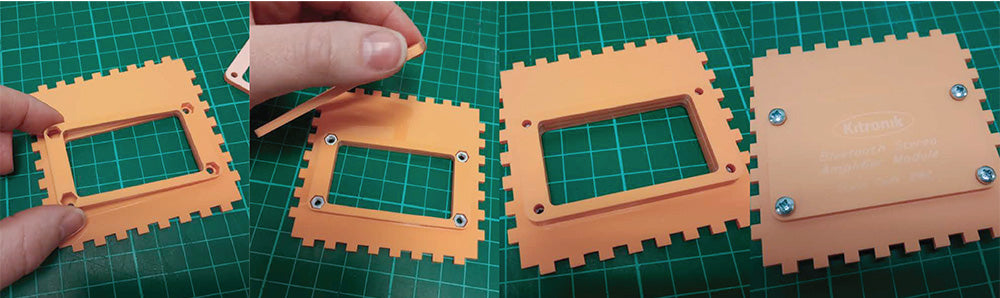
Step 3 - Affix the Amplifier PCB:

Take the Base piece (the orange acrylic piece with four unevenly spaced screw holes) and screw the PCB onto it, using four 8mm plastic spacers with a 6mm M3 Pan Head screw at either end.
Step 4 - Attach the speakers:

Screw the speakers onto the back of the two pieces with circular holes using 6mm M3 PanHead Screws and Hex Nuts.
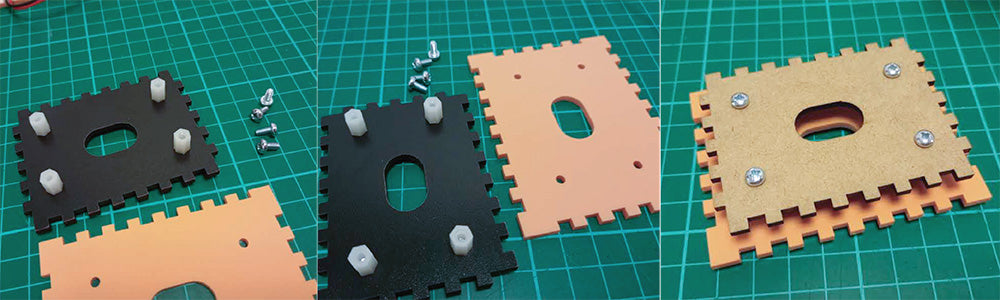
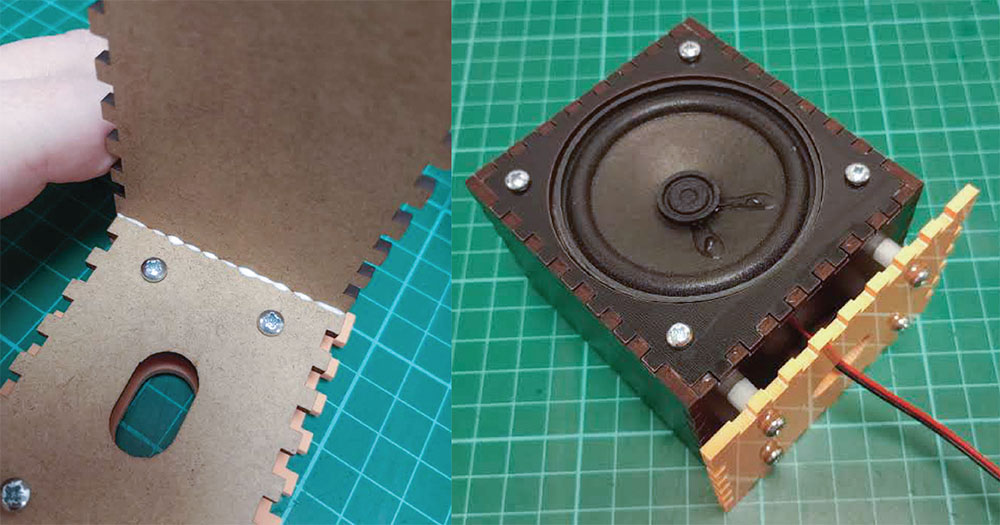
Step 5 - The service hatch:
In order to make the service hatch usable, we will be encapsulating four hex nuts within two layers behind the hatch. Glue the spacer with the hexagonal holes onto the back of the main-panel first, then insert the Hex Nut and glue the second piece with smaller holes on top. Make sure they are aligned accurately! Then, once dry, the front panel can be placed on and screws used to hold it in place.
Step 6 - Orange & black:
Take the top of the orange amplifier, and the bottom of the black one, and attach them together with 8mm spacers and a 6mm pan-head M3 screw on either side.
Step 7 - Upper amplifier assembly:
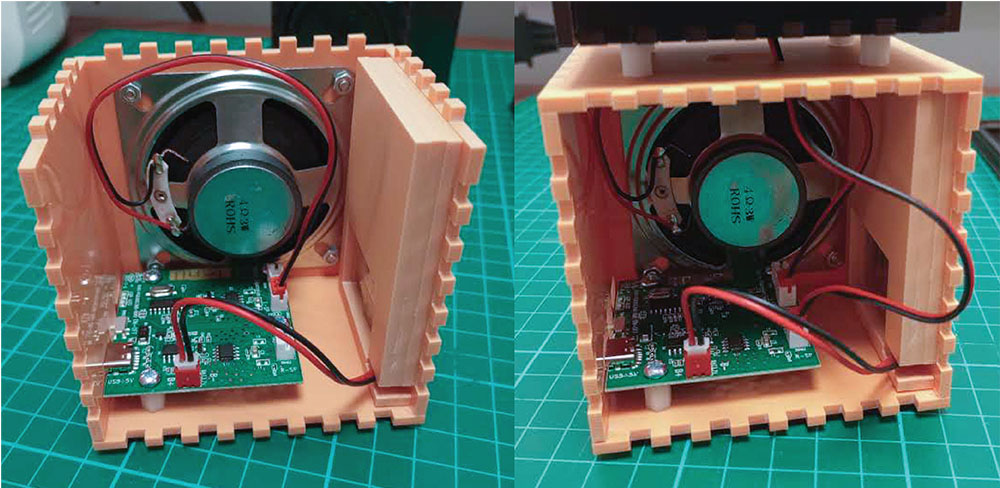
Assemble the upper amplifier on top of the panels you attached together with spacers in step6, using a material-appropriate glue to secure the finger joints. Make sure to feed the speaker wire down through the holes in the middle panels.
Step 8 - lower amplifier assembly:
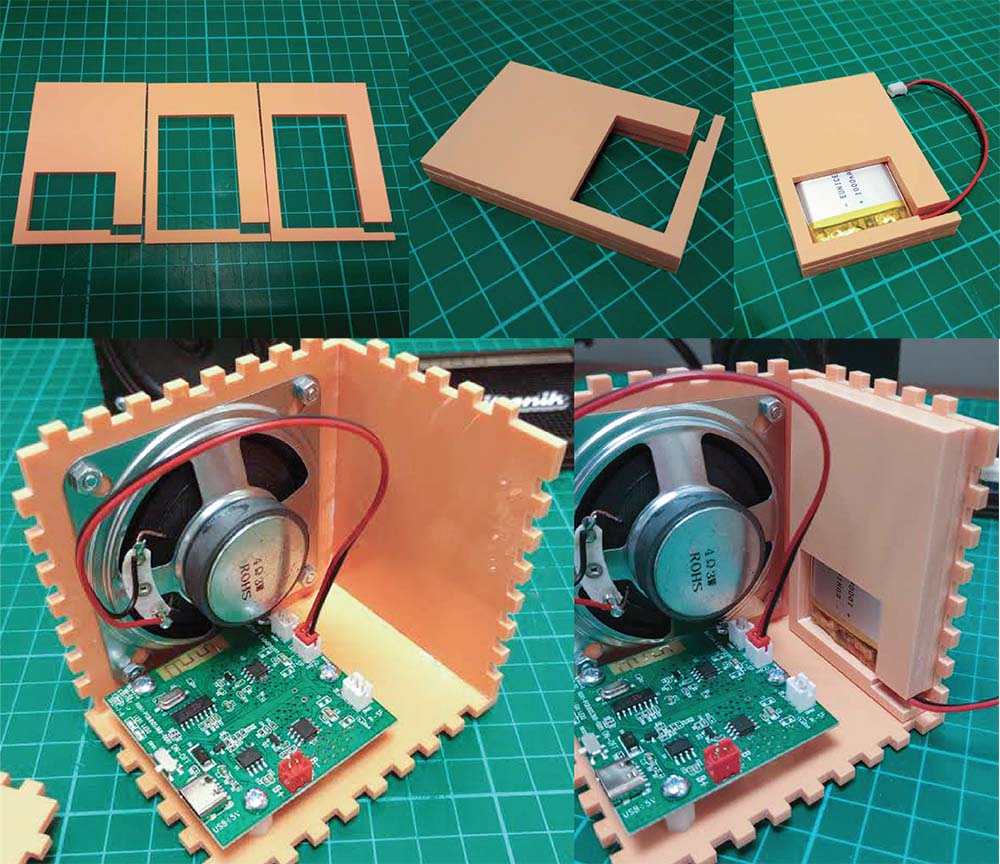
Assemble the lower amplifier halfway, making sure to plug in the speaker when you do. Then glue together the layers of the battery holder in the manner shown in the images below. Put the battery into the holder, then carefully glue the back of the holder to the wall of the amplifier. Make sure to plug in the battery!
Step 9 - Buttoning up the back:
Put the last panels on the lower amplifier, finishing with the back panel, using a material appropriate adhesive to secure the finger joints.
Step 10 - Buttoning up the front:

Glue the front layers together, in the order shown in the images. Then, glue the decorative front sections on to the amplifiers.
Step 11 - Happy Feet:
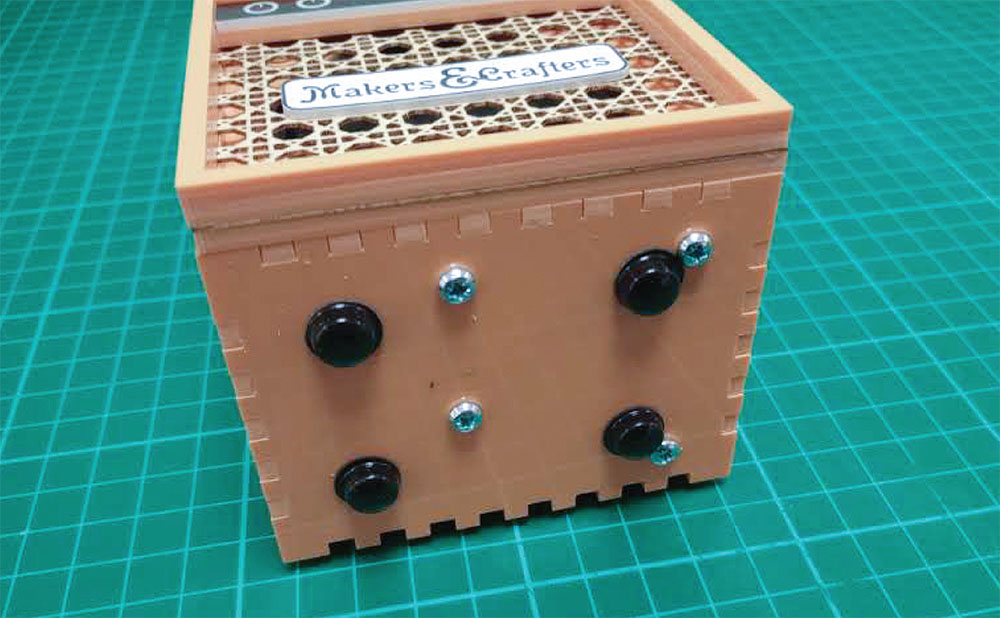
Now you’re almost done, and to finalise the make we have used some rubber feet to stabilise the amplifiers. Add those on, and you’re done!
- Make sure you don't miss out on other makes and resources by signing up for our newsletter here.
©Kitronik Ltd – You may print this page & link to it, but must not copy the page or part thereof without Kitronik's prior written consent.


